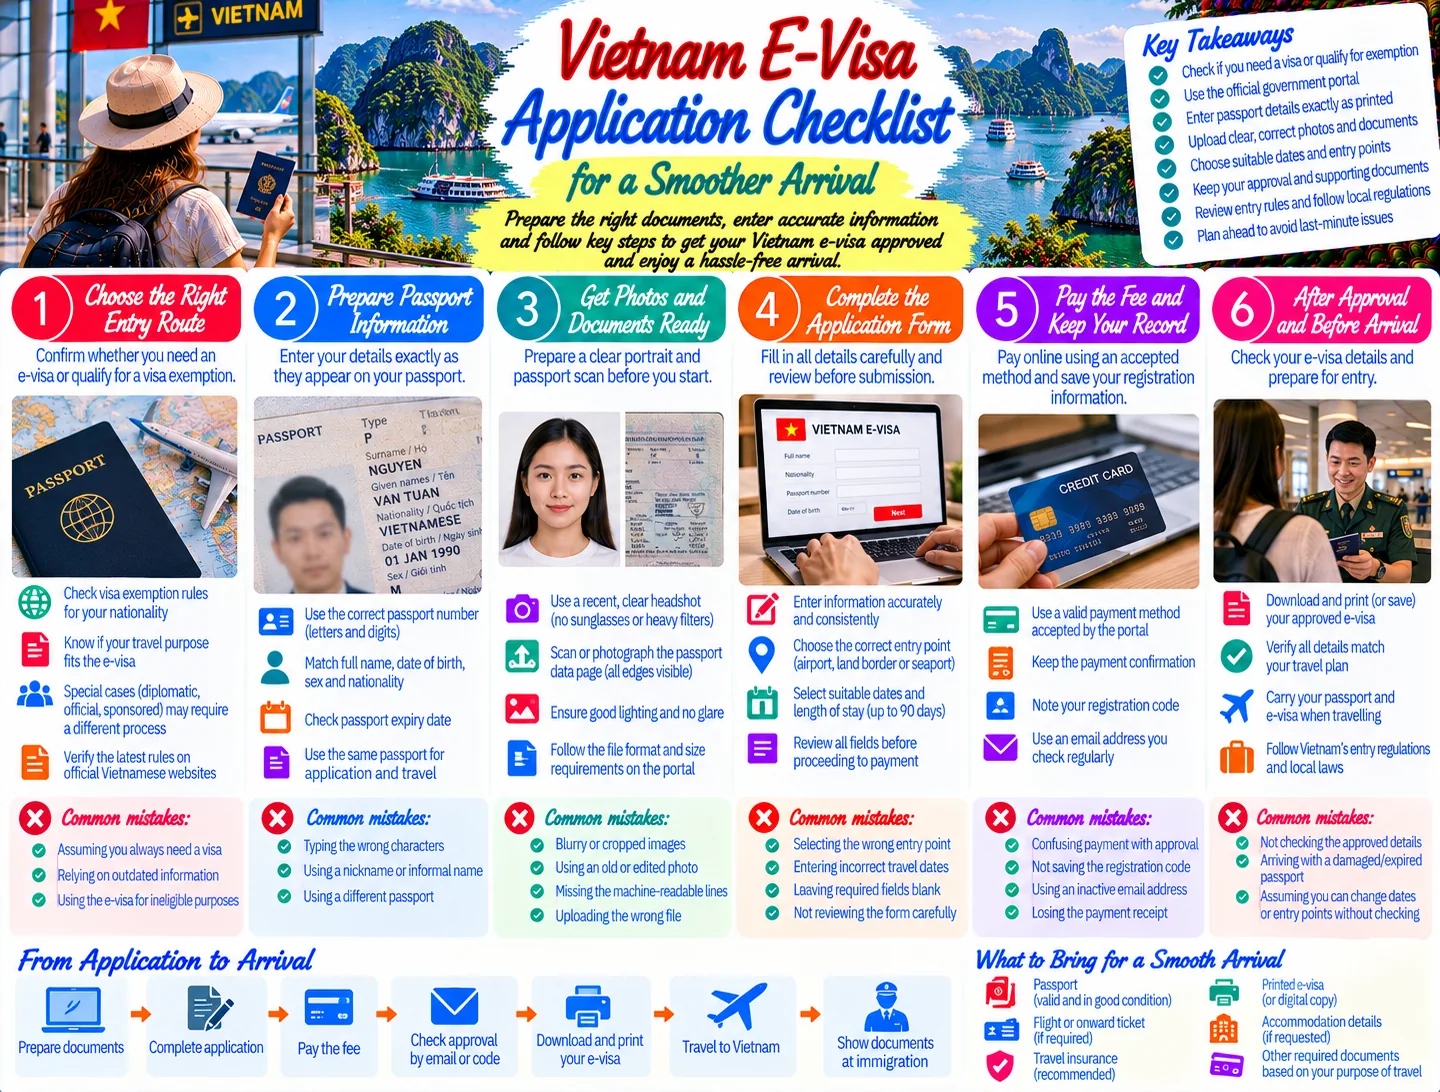
For many travellers, the hardest part of getting a Vietnam e-visa is not the online form itself. It is making sure the passport data, portrait, travel dates and intended entry point all match before payment. Vietnam's Immigration Department says an e-visa can be valid for up to 90 days and may allow single or multiple entry, but approval does not remove the need to present a valid passport and follow Vietnamese entry rules. This practical Vietnam e-visa application checklist focuses on the small decisions that can create delays or an awkward border crossing.
Use it alongside the site's broader Vietnam visa and entry requirements guide, then keep your final approved e-visa and passport details together in one travel folder.
Start with the right Vietnam entry route
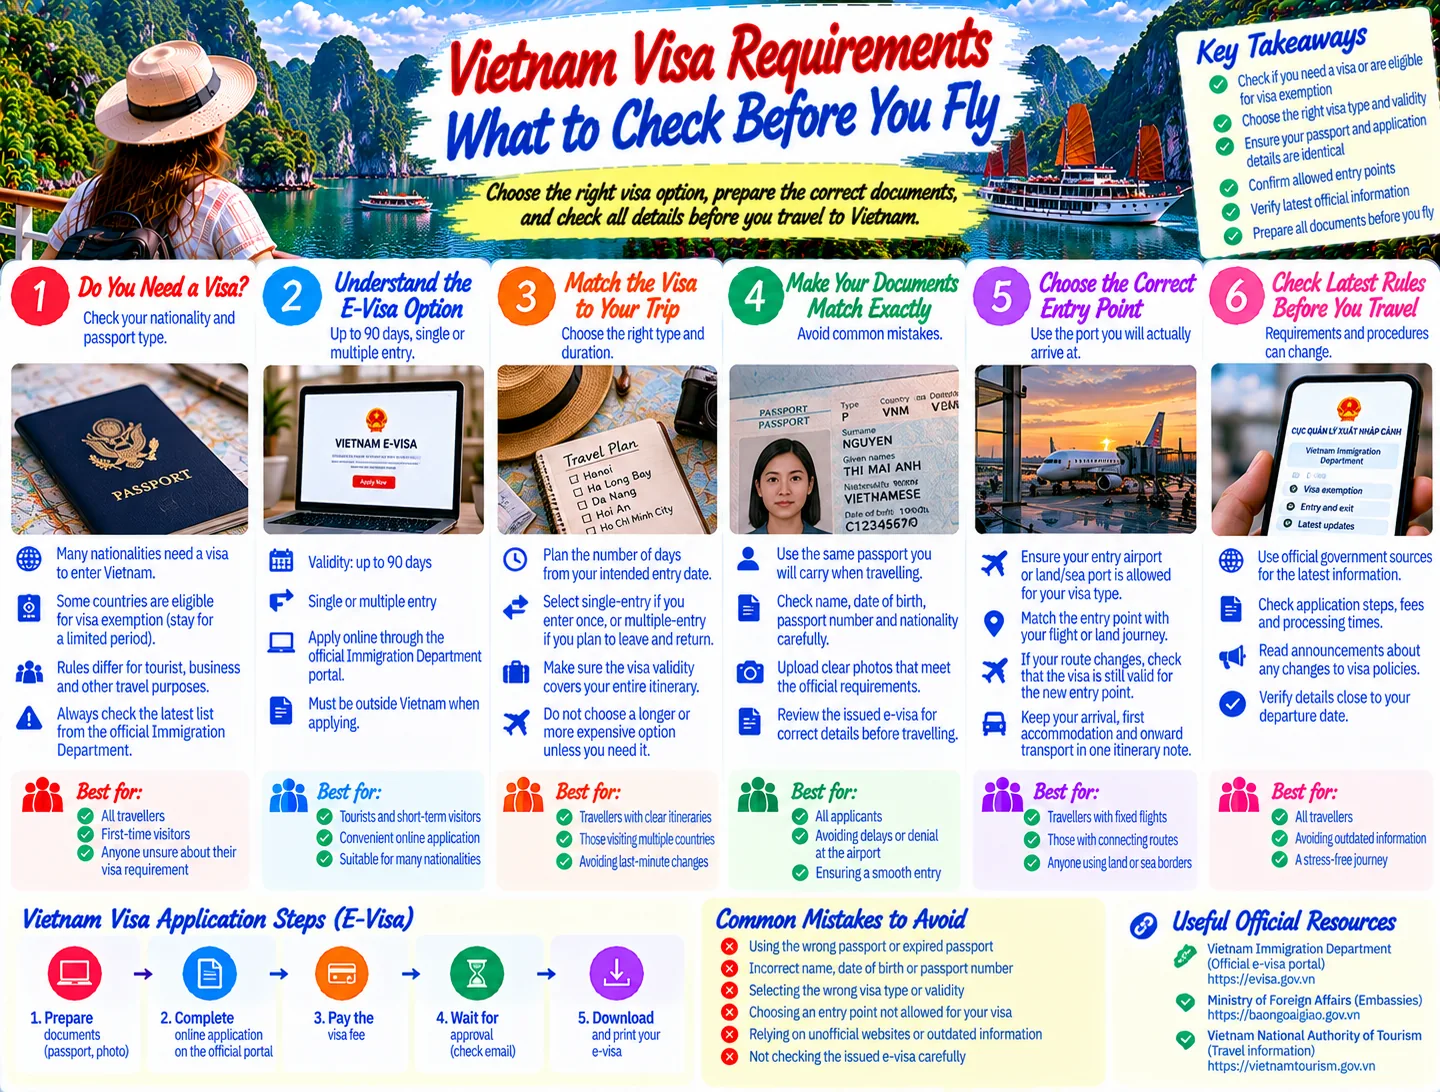
Before opening the form, decide whether an e-visa is actually the correct route for your trip. The official immigration portal describes the e-visa as an electronic visa issued by Vietnam's Immigration Department to foreigners outside Vietnam. It also states that applicants need a valid passport and must not fall into categories subject to suspension from entry. That means the online form is not a universal substitute for every visa or entry procedure.
Check whether you need a visa at all
Visa exemption rules depend on nationality, passport type, purpose and the applicable conditions at the time of travel. Do not assume that a friend's experience, an old blog post or a previous trip answers your question. If you may qualify for an exemption, verify the current position through an official Vietnamese source before building a paid e-visa application around it.
Know when the standard online route may not fit
The Immigration Department's notices identify special groups connected with diplomatic missions, official delegations and certain invited or sponsored visitors. Those cases may follow a different process rather than the ordinary self-application path. If your trip involves official work, diplomatic status, sponsorship or an unusual passport, confirm the correct channel before paying a non-refundable fee.
For a general holiday, the ordinary e-visa route is usually the relevant starting point. The practical companion to this article is the site's Vietnam Visa & Entry category, where you can compare entry-document planning with related guidance.
Prepare the identity details exactly as printed
The safest way to complete an e-visa form is to treat your passport as the source of truth. Do not rely on memory, a booking profile or an automatically completed airline record. Open the biographical page and copy the details carefully, preserving the order and spelling shown on the document.
Use the passport number exactly, including letters and digits in the correct sequence.
Match your full name, date of birth, sex and nationality to the passport record.
Check the passport's issuing and expiry information before submitting.
Use the same passport for the application and the journey unless the authorities tell you to follow another procedure.
A single transposed character can create a mismatch at check-in or immigration. Before payment, compare every typed field visually against the passport, ideally with a second person reading the document while you read the form. This is a useful point to slow down: a fast submission is not helpful if the approved document contains the wrong identity data.
Make a clean working copy
Keep a private note with the exact passport spelling, intended arrival date and chosen entry port while you complete the application. Do not paste sensitive passport information into public travel forums or share screenshots that expose the document number. A checklist should reduce errors without creating a new privacy problem.
Get the portrait and passport scan ready
Application uploads are another common source of avoidable rejection or delay. Prepare the required portrait and passport image before you begin, using clear files that show the information without glare, blur or cropped edges. The official portal is the place to confirm the current technical requirements shown during your application; do not substitute an image that merely looks acceptable on a phone screen.
Use a recent, recognisable portrait
Choose a straightforward head-and-shoulders image with your face clearly visible and no distracting filters. Avoid sunglasses, heavy shadows, dramatic angles and anything that makes the image difficult to compare with your passport. If the portal rejects the file, correct the file itself rather than repeatedly uploading the same image and hoping it passes.
Make the passport page legible
The biographical page should be flat, complete and easy to read. Check that the machine-readable lines at the bottom are visible and that no finger, reflection or crop covers the document edges. A scan or well-lit photograph is preferable to a compressed screenshot. Save the files with simple names so you can identify the portrait and passport copy without opening the wrong attachment.
Do not invent a missing document number or guess at a blurred character. If the passport is damaged, close to expiry or difficult to read, resolve that issue before applying. The goal is not only to upload two files; it is to give the reviewing system information that agrees with the form.
Choose dates and entry points conservatively
Travel plans often change after an application is submitted, so review the dates and border details with care. The official immigration portal says the e-visa may be issued for up to 90 days and may be single or multiple entry, but the period and entry permissions shown on your approved document are the details that matter for your trip.
Build a date buffer
Do not make your arrival date the same as a fragile, non-refundable connection if a small delay would put the plan at risk. Give yourself practical room between approval, departure and your first accommodation night. At the same time, do not enter a speculative arrival date simply because it is convenient; use the best-supported plan you have when submitting and check the final approved dates before departure.
Verify the intended port
Airports, land borders and seaports are not interchangeable just because they are all in Vietnam. The immigration portal provides a list of ports that accept e-visa entry and exit. Check the exact port name against your flight, bus, train-connected border plan or cruise documents. If your itinerary crosses more than once, review whether the approved visa's entry type and listed port choices fit the whole journey.
This is also where transport planning matters. The site's guide to travelling around Vietnam by train, flight and bus can help you separate the immigration decision from the onward-transport decision. First make sure you can legally enter at the planned point; then choose the easiest connection to your first stop.
Review payment and submission before clicking
The official portal states that the e-visa fee is paid through an electronic payment gateway and is not refunded if the application is refused. Treat the payment screen as the final proofreading checkpoint, not as a formality.
Confirm the name and passport number one more time.
Confirm your intended entry date and port.
Check that your email address can receive the application reference or result notice.
Make sure the card or payment method is ready without refreshing the form mid-process.
Save the reference details shown after submission.
Do not pay a second time just because the confirmation page loads slowly. First check whether the transaction, application reference or status has already been recorded. Keep any payment confirmation and reference number together. If the portal displays a technical problem, use the official support route rather than sending passport data to an unverified intermediary.
Use the official domains
The Immigration Department announced that the electronic visa portal operates on the newer evisa.gov.vn and thithucdientu.gov.vn domains. Bookmark the official address you use, and be cautious with sponsored search results or lookalike sites that add service charges. A commercial agency may be legitimate, but it is not the same as the government's own application channel.
Check the approved e-visa against your trip
Approval is not the end of the checklist. Download the approved document and compare it with your passport and itinerary before leaving home. Look at the name, passport number, nationality, date of birth, validity dates, entry type and port information. Do not rely only on a phone preview; open the complete file and keep an offline copy.
If a field is wrong, do not assume an airline agent or border officer can simply correct it on arrival. Contact the official support channel or follow the portal's instructions for the specific problem. The earlier you identify a mismatch, the more options you have to adjust your plans without losing a flight or hotel night.
Carry the approved e-visa in at least two accessible forms, such as a printed copy and an offline digital copy. Keep the passport used for the application with it. A backup is sensible because airport Wi-Fi, phone batteries and roaming access are not guaranteed at the moment you need the document.
Plan the arrival day around the document
On travel day, keep your passport, approved e-visa and first-address details easy to reach rather than buried in checked luggage. Recheck that the passport number on the document matches the passport in your hand. If your route has changed since approval, pause before boarding and verify that the new arrival point remains compatible with the visa.
Allow time for normal airport or border procedures and avoid scheduling an immediate domestic connection that leaves no room for immigration processing. Your entry document solves one part of the journey; it does not guarantee a fixed processing time or replace other checks required by Vietnamese authorities.
For broader preparation, pair this checklist with the site's guide to preparing Vietnam entry documents and the Essential Vietnam Travel Tips category. These links are useful when you move from visa approval to insurance, bookings, money and day-one logistics.
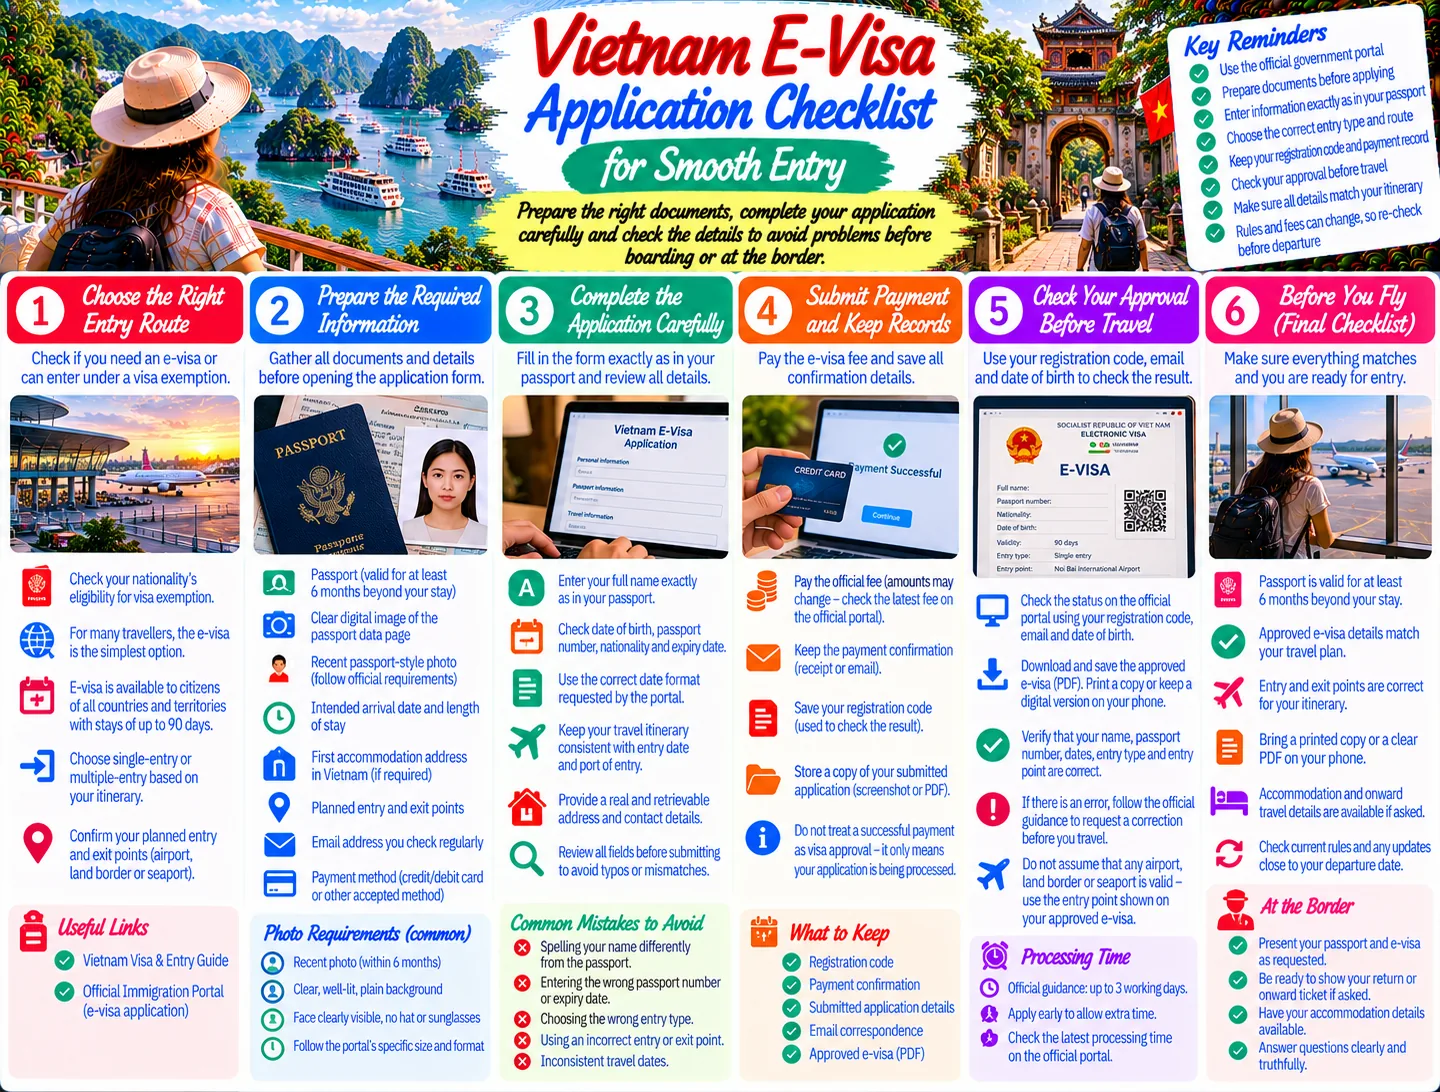
A final five-minute Vietnam e-visa checklist
The official portal and application route are correct for your nationality and trip.
Your passport will remain valid for the journey, and every identity field matches it exactly.
The portrait and passport image are clear, complete and accepted by the form.
Your intended arrival date, entry type and port match the actual itinerary.
You saved the reference, payment record and approved e-visa in offline and printed forms.
Vietnam entry planning becomes much easier when you separate research from final verification. Use official immigration information for the current rules, slow down at the identity and port fields, and compare the approved e-visa with the passport before you travel. That small final check can prevent the most avoidable problems at the start of your trip.
JOIN THE CONVERSATION
Comments (0)
No comments yet. Be the first to share a thought.