For many travellers, the hardest part of entering Vietnam is not the border crossing itself but getting every detail on the application to match the passport. A small spelling difference, an incorrect travel document number, or an airport selected without checking the approved entry list can create avoidable stress. This Vietnam e-visa application checklist turns the process into a sequence you can review before paying, before flying, and again on arrival.
Vietnam’s Immigration Department states that an electronic visa can be valid for up to 90 days and may allow either single or multiple entry. The official system also says applicants should be outside Vietnam, hold a valid passport, and pay through its electronic payment gateway. Rules and portal instructions can change, so use this guide as a planning framework and confirm the live details on the official application site before submitting.
Start with the right Vietnam visa question
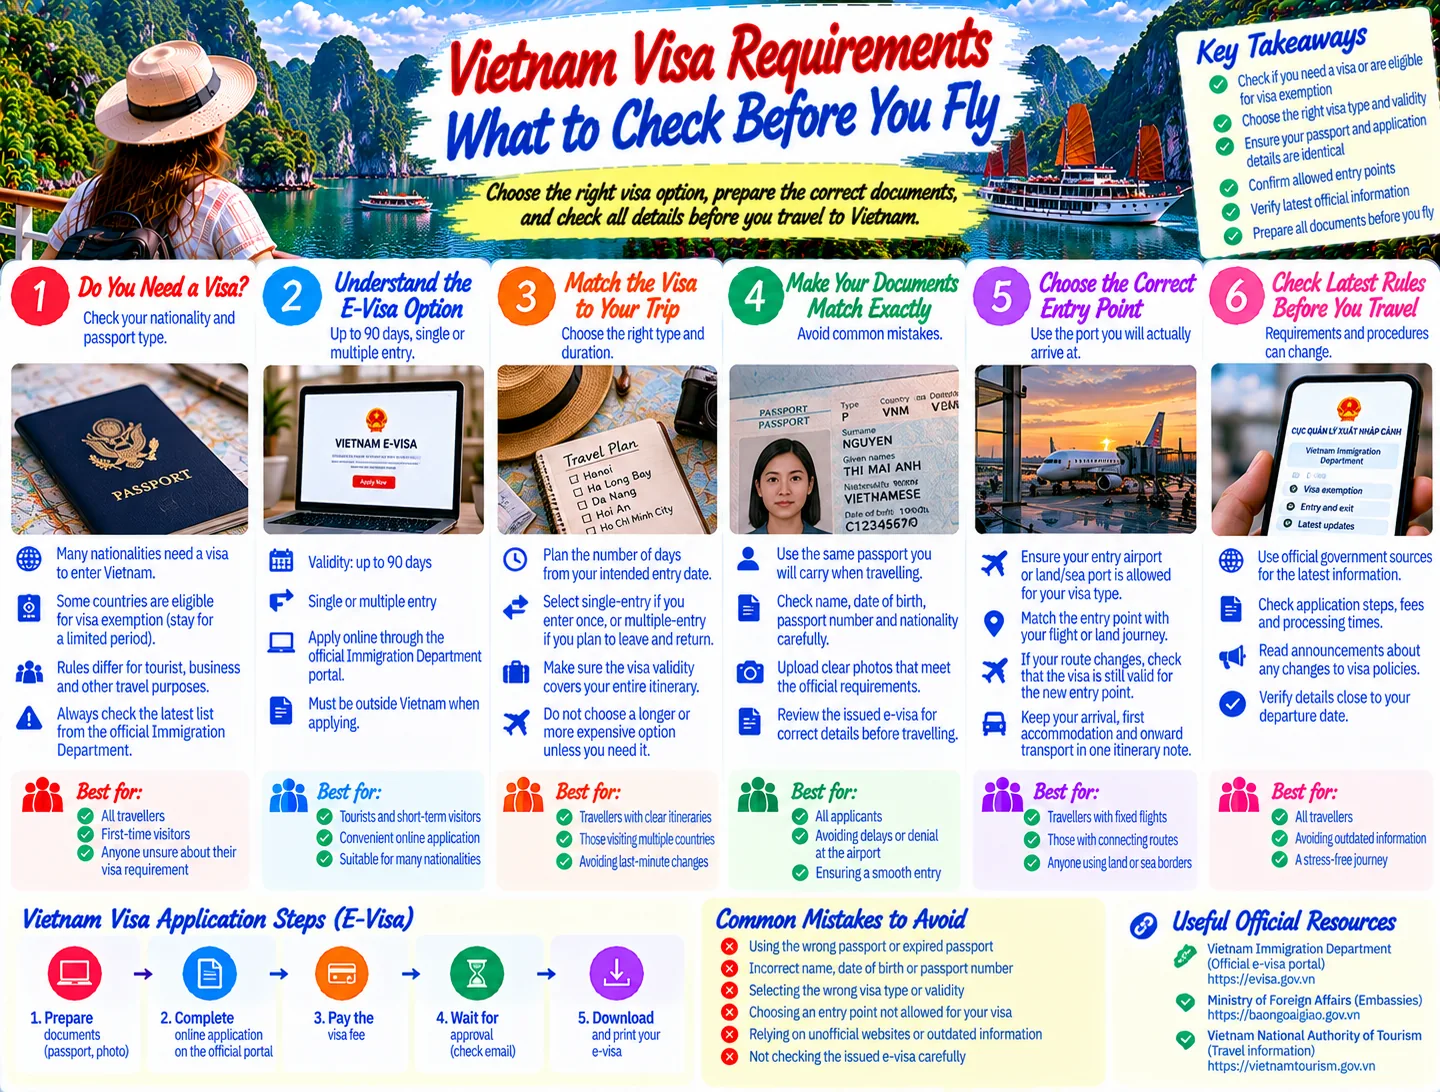
Do not begin by filling in a form. Begin by deciding what permission your trip actually needs. Your answer depends on nationality, the purpose of travel, how long you intend to stay, whether you will leave and return, and the border point you plan to use.
Check whether an e-visa fits your trip
The national immigration guidance describes the e-visa as a visa issued electronically to foreigners through the Immigration Department’s system. It is designed for people outside Vietnam who want to enter the country and who meet the stated conditions. If your circumstances involve sponsorship, special categories, or an exception under Vietnam’s immigration law, the standard online route may not be the correct one.
Read the official conditions before you rely on an online approval. The immigration page specifically identifies three basic points: you are outside Vietnam, you hold a valid passport, and you are not in a category suspended from entry under Vietnamese law. That is more useful than assuming every traveller follows the same process.
Match the visa to the itinerary
Write down your first arrival point, your planned departure point, your intended entry date, and whether you might return to Vietnam during the trip. A multi-country itinerary can expose mistakes that remain invisible on a simple return flight. If you expect to cross a land border or use a seaport, confirm that the selected point is accepted for the permission you are applying for rather than choosing an airport by habit.
Use only the current official application route
Vietnam’s Immigration Department has published a notice that the electronic visa portal operates on the domains thithucdientu.gov.vn and evisa.gov.vn. The older immigration information page directs applicants to those newer addresses. This matters because search results can contain agency pages, copied forms, and outdated instructions that look official.
Before entering personal details, check the address bar carefully. Look for the government domain, a secure connection, and a page that clearly identifies Vietnam’s Immigration Department or the national electronic visa system. Avoid paying through a link sent in an unsolicited message. An agency can be legitimate, but it is not the same as the government application route, and its service terms may be different.
- Save the official portal address in your trip notes rather than relying on a sponsored search result.
- Keep the application code, payment confirmation, and any downloaded approval in one secure folder.
- Use the official results-checking function to confirm the status instead of trusting a forwarded screenshot.
For background reading, compare this checklist with Vietnam Visa and Entry Requirements: A Practical E-Visa Guide on this site, then return to the government portal for the live form and instructions.
Prepare your documents before opening the form
Preparation is where most avoidable errors are removed. Keep the passport you will actually use for the trip beside you. Do not apply with an old passport and plan to travel with a replacement unless the immigration authority has told you exactly how to handle the change.
Passport details to have ready
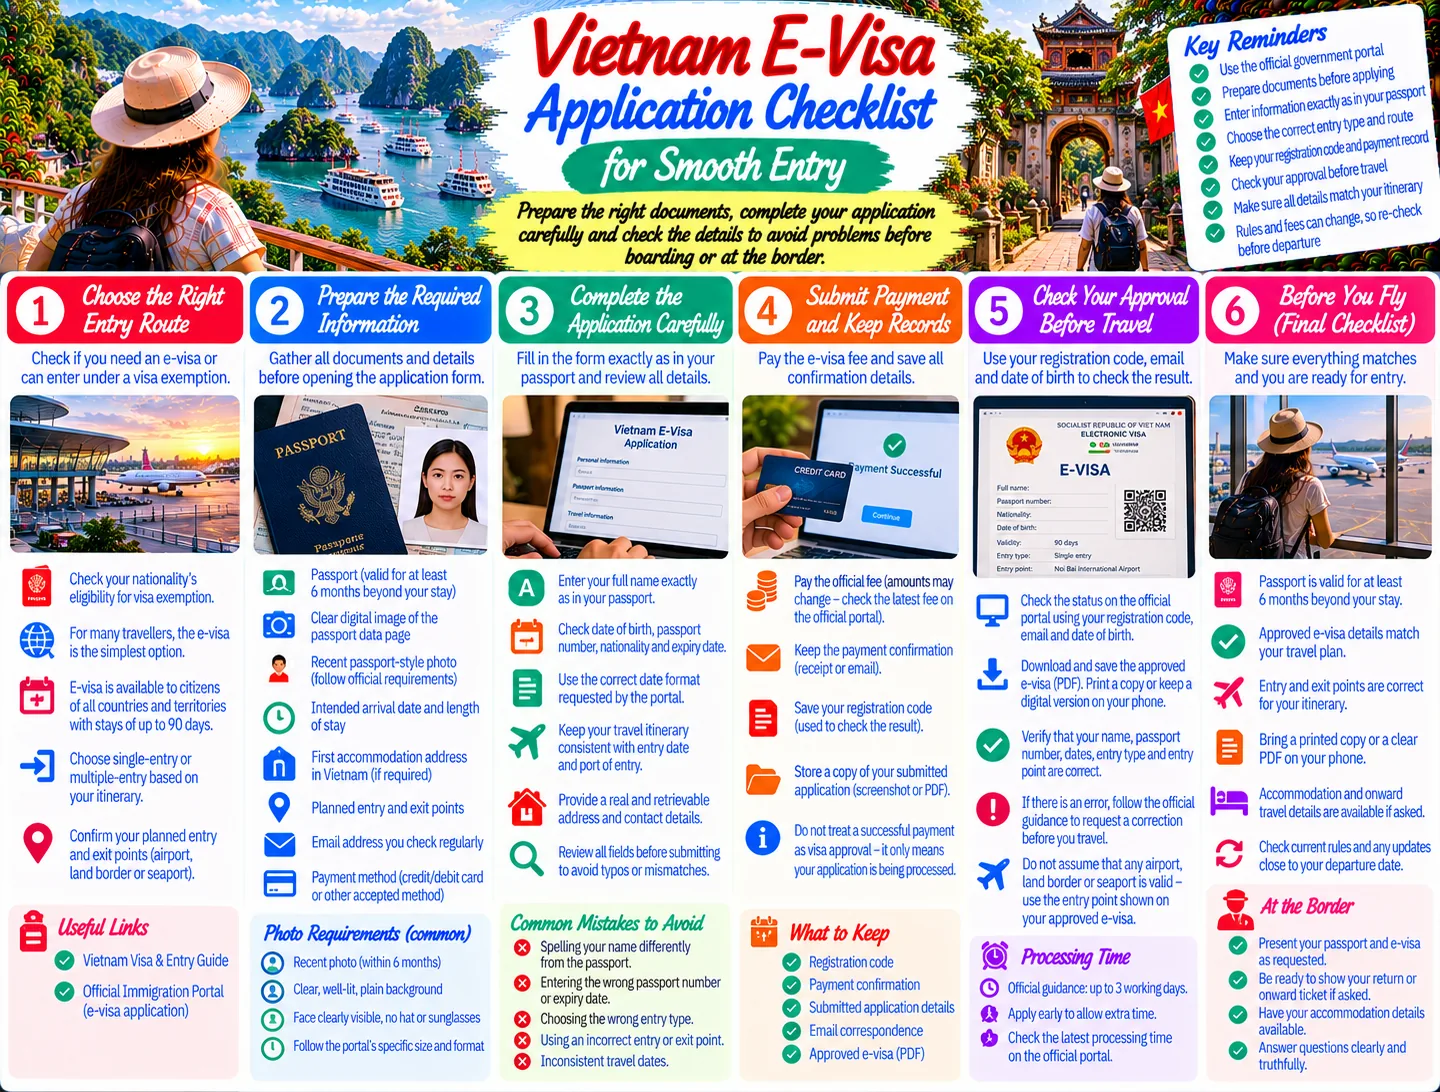
- The full name exactly as printed in the passport’s machine-readable or biographical section.
- Date and place of birth, nationality, and sex as requested by the form.
- Passport number, issue date, expiry date, and issuing authority.
- A clear digital portrait and a readable passport data-page image in the format accepted by the portal.
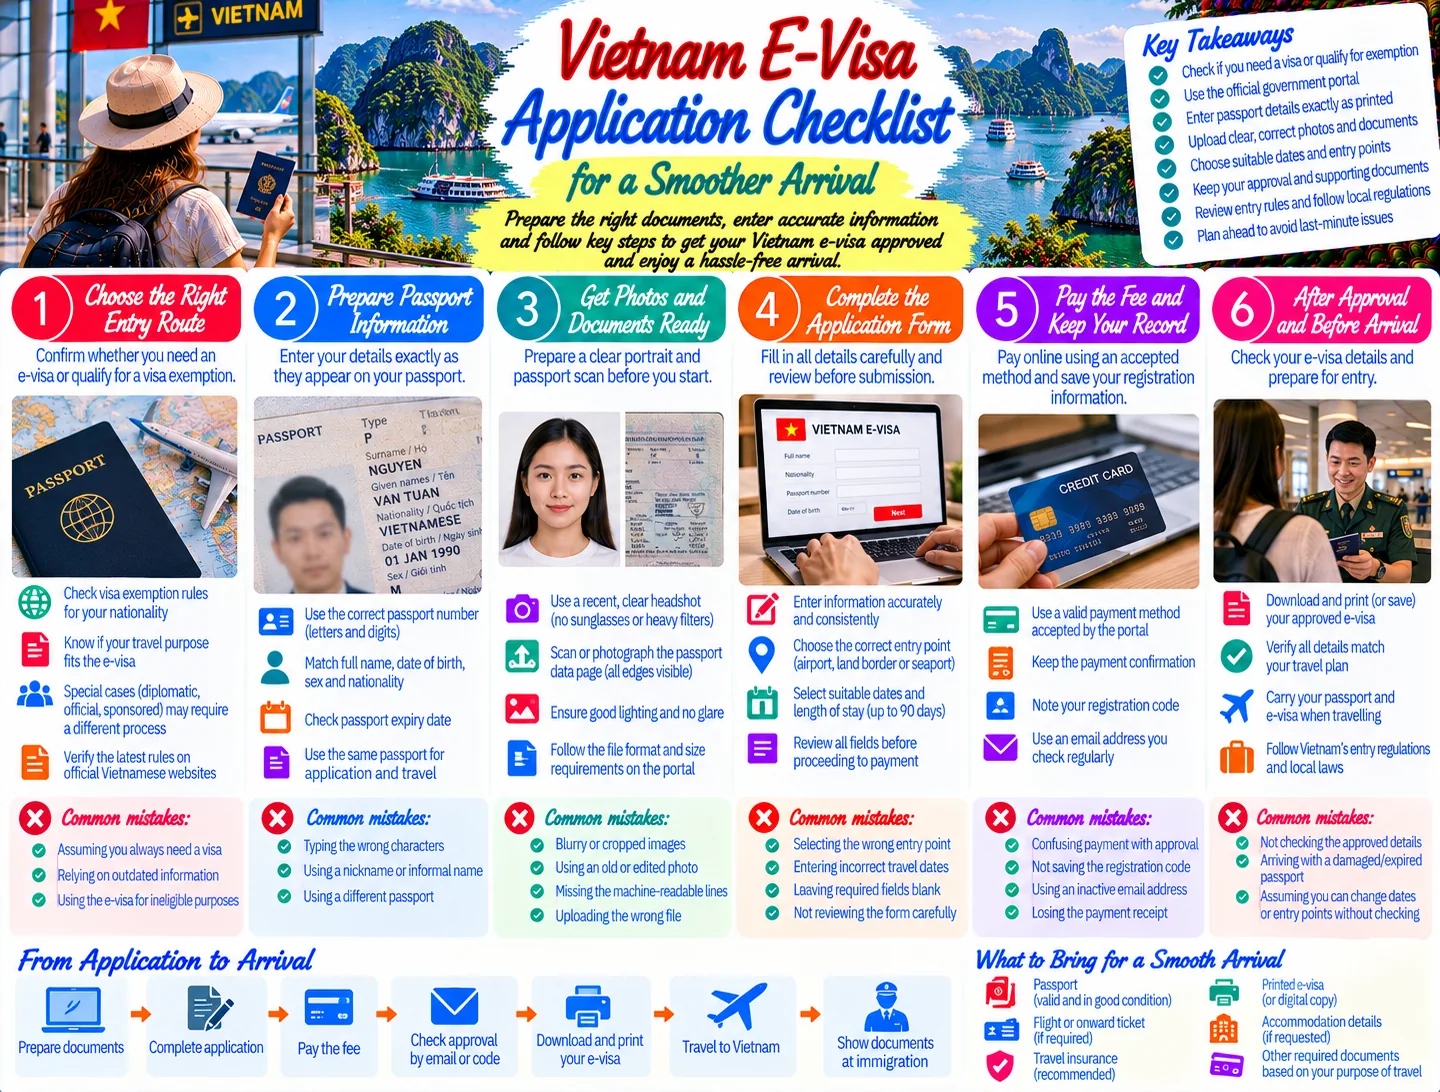
Check every character. Pay special attention to zeros and the letter O, hyphens, middle names, and the order of names. If your passport contains accents or a transliterated version, follow the form’s field instructions instead of inventing a shortened name. The safest rule is consistency: the application, approval, airline record, and passport should describe the same traveller.
Trip details to decide in advance
Have a working itinerary before you submit. You should know the intended entry date, the place where you will first enter Vietnam, your temporary address or accommodation details if requested, and your expected exit date. If you are moving between regions, the first accommodation is usually the easiest address to document, but follow the form’s exact wording.
A useful companion is Preparing Your Vietnam Entry Documents, which can help you organise the wider travel file around the visa application rather than treating the approval as the only document that matters.
Complete the form slowly and review it twice
Online visa forms reward accuracy more than speed. Enter the information from the passport, not from memory or an airline booking that may use a shortened name. When a field does not apply, use the portal’s permitted option rather than leaving a required field blank or adding an explanation in the wrong box.
Use a two-pass review
On the first pass, check identity fields: name, birth information, nationality, passport number, and dates. On the second pass, check travel fields: entry date, exit date, intended entry point, requested number of entries, and the contact or accommodation information. Reading the form in two different ways makes it easier to catch a single wrong digit.
- Compare the typed passport number character by character with the document.
- Confirm that the requested validity begins early enough for your flight and ends after your planned departure.
- Check that the selected entry point matches the route on your ticket.
- Review the portrait and passport scan at full size before uploading.
- Take a screenshot or save the application reference only after the form has been submitted successfully.
Do not assume that a paid application can be edited freely. The official immigration guidance says the e-visa fee is paid through an electronic gateway and is not refunded if the application is refused. That is a strong reason to proofread before payment, not after.
Understand approval, validity, and entry-point planning
An approval is permission to seek entry under the details shown on that approval; it is not a replacement for your passport and it does not remove the need to meet border requirements. The official immigration guidance describes the e-visa as valid for a maximum of 90 days, with single or multiple entry options. Your own approval may specify a shorter or different validity period, so read the document rather than relying on a general maximum.
Build your itinerary around the approved dates
Do not arrive before the approved start date and do not plan to remain after the approved end date. If your flights change, compare the new itinerary with the dates and entry point printed on the approval. A change in airport, land crossing, or seaport can be more important than a change in flight number.
For multi-country trips, count the entries you actually need. A traveller who leaves Vietnam for a neighbouring country and comes back may need a multiple-entry permission; a traveller flying home once may not. If the plan is uncertain, decide before submitting rather than hoping to amend the application at the airport.
For the ground journey between approved entry points and hotels, see How to Travel Around Vietnam: Trains, Flights, Buses and More. It is especially useful when your arrival airport is not close to your first overnight stop.
Make an arrival-day document pack
Keep your entry documents available in both a digital folder and an offline copy. You may be asked to show documents when checking in, during transit, or on arrival. A phone with a dead battery is not a document strategy, so download the approval before leaving reliable internet access.
- Passport used for the application.
- Downloaded or printed e-visa approval.
- Application reference and payment record.
- Flight, bus, or cruise details showing your intended entry point.
- First accommodation address and a contact number if available.
- Travel insurance and onward or return booking details, if you carry them for your trip planning.
Keep the passport and approval together, but do not pack them in checked luggage. Make sure the name and passport number on the approval match the document in your hand. If a carrier asks questions before boarding, answer from the approval and itinerary rather than from an old booking or a saved draft application.
Common mistakes that derail otherwise good applications
Using an unofficial portal
Search visibility is not proof of government ownership. Start from the domains named by Vietnam’s Immigration Department, and be suspicious of pages that pressure you to pay quickly or promise guaranteed approval.
Choosing the wrong entry point
Travellers often focus on the city and overlook the border gate. The entry point is part of the travel plan. Check the official list and compare it with your ticket or overland route before finalising the application.
Submitting inconsistent identity data
A missing middle name, swapped date format, or digit copied incorrectly can create a mismatch. Do not use the name format that is most convenient for hotel bookings; use the format required by the passport and form.
Leaving the review until the airport
Airline check-in is not the right time to discover that the approval starts tomorrow or names a different passport. Review the approval several days before departure and again when you pack.
For broader preparation, the site’s Essential Vietnam Travel Tips category covers the practical checks that sit around the visa process, while the First-Time Vietnam Travel category is useful if this is your first international arrival in Vietnam.
A simple final checklist before departure
Use this final sequence 48 hours before leaving, then repeat it before heading to the airport:
- Open the official approval and confirm your full name and passport number.
- Check the approved start and end dates against your itinerary.
- Confirm single or multiple entry matches the countries and border crossings on your plan.
- Match the approved entry point to the flight, bus, or cruise booking.
- Download the approval to your phone and keep a backup copy offline.
- Pack the same passport used in the application in your carry-on.
- Keep your first accommodation address and onward travel details accessible.
- Recheck the live official portal if your passport, route, or dates change.
Vietnam entry preparation becomes much easier when you separate three tasks: choosing the right permission, entering passport data exactly, and carrying a usable document pack. Start with the official immigration guidance, allow time for a careful review, and treat the approved dates and entry point as fixed planning constraints. That approach will not remove every border question, but it greatly reduces the avoidable mistakes that cause last-minute travel stress.
JOIN THE CONVERSATION
Comments (0)
No comments yet. Be the first to share a thought.